Home-brew Water Resistance Pressure Tester
Background
There are three basic types of testers for checking the water resistance of wristwatches:
- Coat the watch in soapy water or submerge it in water, subject it to a vacuum, and watch for bubbles.
- Subject the watch to air pressurized to whatever the desired test pressure is for several minutes, then immerse in water while releasing the pressure, watch for bubbles.
- Subject the watch to air pressurized to whatever the desired test pressure while measuring the deflection of the crystal with a dial indicator. Watch for the crystal to deflect and stay deflected
There is a unit of type 1 made by Boluva that shows up often on EBay. This test has two flaws: Firstly the maximum pressure differential that it tests is only 1 ATM (usually more like 1/2 - 3/4 ATM), and second that differential is opposite to what the watch was designed to withstand. (Although small enough that it should be safe.) But still for testing the basic integrity of the seals it does work.
Both Bergeon & AF make testers of type 2 (there are also some other
antique brands I see from time to time on EBay such as Peerless:)
This test has it's flaws as well. In particular there is the danger that if the watch did leak when pressurized, the resulting differential can blow the crystal clean off the case, flooding the watch if this happens while submerged.
Finally there's type 3, If you check the Jules Borel catalog there's
a couple models from Vibrograph starting at $2000. This is clearly
the safest method, but also the most difficult. And if the watch does
have a leak you don't get any indication as to where.
The Design
So having decided I wanted at least type #2, and not quite being willing to spend $300 on a used Bergeon or $500-600 on a new Bergeon or AF unit I started thinking about building my own.
The first issue is simply making a transparent test chamber. Searching the online McMaster-Carr catalog (If you're in the US I can highly recommend these guys by the way: www.mcmaster.com) I first found clear cast acrylic tubing available in a wide variety of diameters. However, the stuff is pretty pricey, and worse it isn't any standard pipe size so I would still be left with fabricating some sort of end seals.
But then I discovered that the make transparent PVC tubing. It is also pretty expensive in the larger sizes. I ended up choosing 2" Schedule 40 (McMaster part #49035K28). It's rated up to 140 PSI or 9 ATM. Probably higher than I'll be testing. Two inches is pretty small, but large enough to fit any watch I own.
The next challenge is how to submerge the watch from the outside. The Bergeon and similar units do this with a push rod through a sealed opening. Far more machining and fabrication that I was going to do in my home workshop. But then I realized that rather than lower the watch into the water, you only need to be able to cause the test chamber to fill with water.
So here is the resulting design:
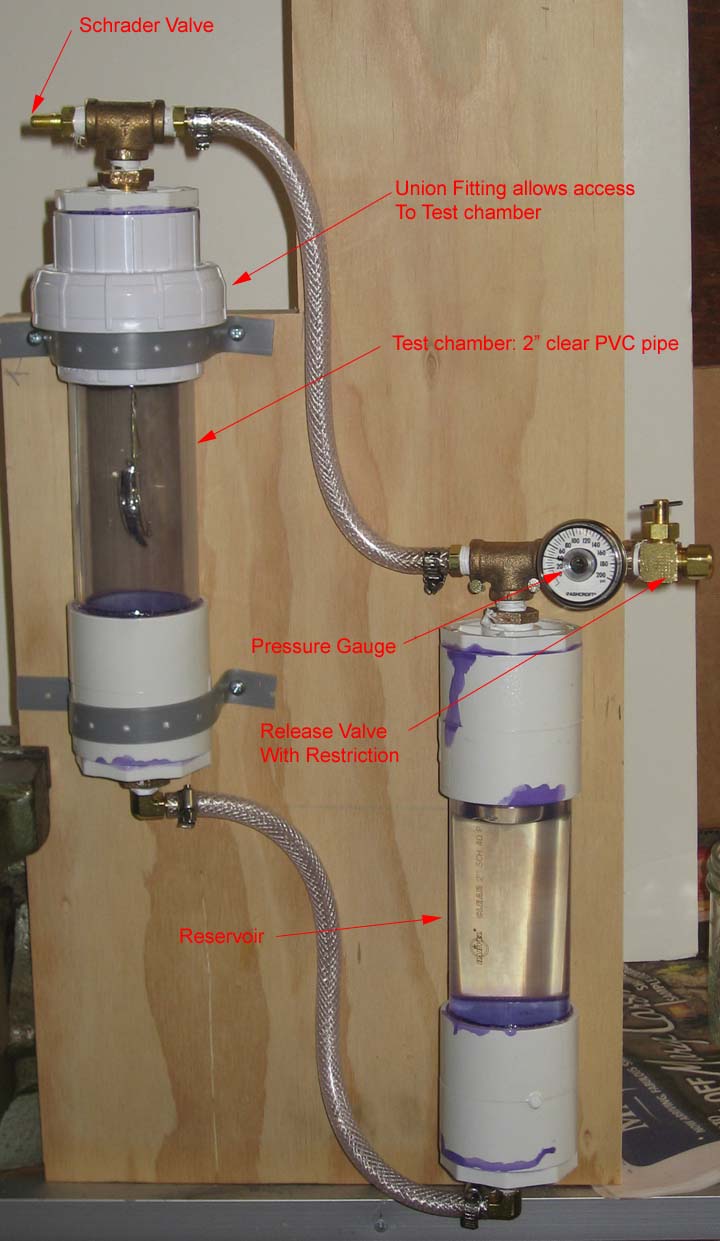
As you can see the system consists of two sections of clear PVC pipe joined both top and bottom by flexible tubing.
The test chamber has a Union fitting at the top to allow for access.
The plywood mounting board has too sets of hooks for the reservoir, the lower set where it is hanging in the picture and an upper set which raises the reservoir above the test chamber. The water then just flows by gravity into the test chamber.
The testing process is the same as with the Bergeon or AF units:
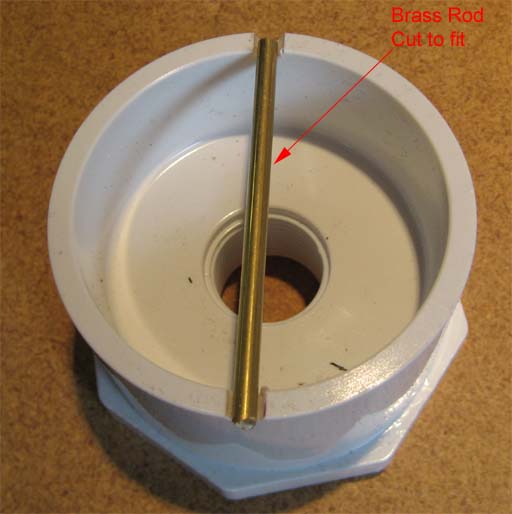
- The watch is suspended within the test chamber, and the chamber sealed
- The system is pumped up to the test pressure (45 psi for 3 ATM, 90 psi for 6 ATM , up to 135psi for 9 ATM)
- Wait 5 minutes
- Release the pressure. This "dry run" is because a badly leaking watch can easily have it's crystal blown off by the dropping pressure. Disastrous if the watch is under water.
- Pump the system back up to the test pressure.
- Wait 5 minutes
- Raise the reservoir to the upper level to flood the chamber.
- Once the watch is submerged open the release valve and watch for bubbles coming from the watch.
If bubbles are observed then the reservoir should be lowered to get the watch out of the water as fast as practical.
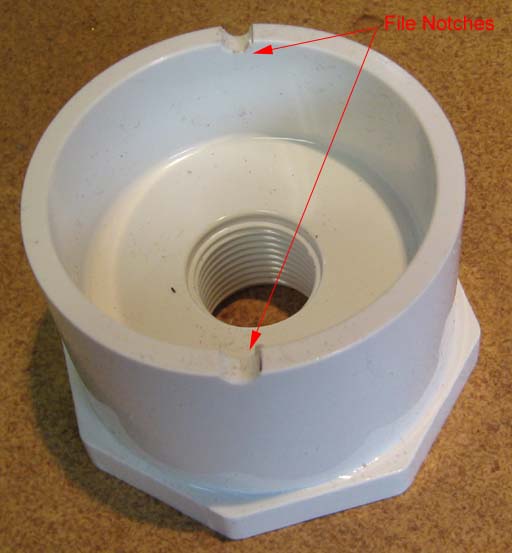
Some design Details


Final Thoughts
The parts to build this ended up being a bit over $100. The most expensive bit being the 4' length of clear tubing ($32), although I still have 34" of it left, and the union fitting ($17). The brass piping parts make up the majority of the remainder. I believe everything could be purchased from McMaster-Carr, however I only bought the clear plastic, the large fittings, and the Schrader valve from them, the rest came from the local hardware store.
I used 1/4 reinforced tubing and "barbed" fittings for the interconnecting tubes. You could also use the prefabricated tubes meant for hooking up faucets. Using a larger diameter of tubing for the bottom tube would probably significantly increase the fill/drain speed. It probably takes 20-30 seconds with the 1/4" tubing.
The biggest flaw with the idea is that it is rather large and going to be a pain to store.
It also occurred to me that it wouldn't really be that hard to make a type 3 tester. The biggest work would be building a suitable holder to hold the watch and a dial indicator. Otherwise build a pressure chamber out of the same materials, probably use 3" Schedule 80 pipe. This would be considerably more expensive than the wet tester shown hear, but I'll bet it could be fabricated for considerably less than the commercial units.